Zen and the Art of Shooting a Toddler

I am a super lucky Chocha (Aunt in Ukrainian) because I have the cutest subject available to me whenever I want, but I’m not actually responsible for him 24/7. Best of both worlds! Simon is pushing 2 and is smart, funny and just a real joy to be around. And he gives the best hugs!

Simon at the fence

The sun was behind this fence, but it was reflecting beautifully off of a nearby building. Thankfully he thought it was fun to run to the fence, lean for a second and run back to us!

Last weekend I had the pleasure of a park outing with Simon & his Mama (my lil sis) where we changed his outfit about four times but otherwise just let him be a toddler. The only prop we used other than Hemingway, who is never too far away (lucky monkey!), was a bottle of purple bubbles.

Yaaaayyy!!!

His mama is holding his monkey above his head. Fun, until it isn’t anymore. Get your shots while you can!

Pre-photoshoot I read a bunch of articles about shooting toddlers looking for advice and inspiration. Other than the bubble idea (which worked a bit differently with Simon), the main concept I picked up was something I think I already do. Just let them be themselves, and be ready to shoot at all times. Anyone who has spent any time with a toddler knows that you can’t make them do exactly what you want. Make sure they feel safe and comfortable, then it is your job to get in there and capture the moments when they happen.

Simon blowing bubbles

Alternately blowing and tasting bubbles. More entertaining for him than chasing them, so that’s what we went with.

The bubble idea is a pretty stock one, but Simon is more interested in exploring how they are made (and how they taste) than in chasing them around and squealing in delight. He was actually more entertained by his own game of throwing his monkey on the ground periodically as if Hemingway had just jumped out of his arms! The important lesson here is to just go with it. If he’s fascinated by the bubble wand and how to make them, then just hand it over and wipe the purple bubble goo off his face as required. Withholding the bubble wand would have resulted in a cranky kid, potentially ending our shoot right there. Instead I got some great shots of him being his naturally inquisitive self.

Hey! I dropped my monkey! Hahahaha!

Hey! I dropped my monkey! Hahahaha!

My quick tips on Shooting a Toddler: 

  1. Go with the flow that the toddler provides and don’t bother to try to fight it. Use what they give you – there is a lot there if you are ready for it. Always be ready!
  2. Make sure they feel safe and comfy.
  3. Be prepared to change course constantly, lie in the dirt and run around a bit (a lot).
  4. Props are good but don’t expect them to work for long. Get your shots fast.
  5. Outfit changes are fun if (and only if) the toddler thinks so too.
  6. Bubbles. They do work. Just be prepared to have them work in a different way than you originally planned.
  7. Final thought – I love shooting with my old-school manual lenses, but I can definitely see the value of auto-focus for shooting a toddler.

Simon blowing a bubble

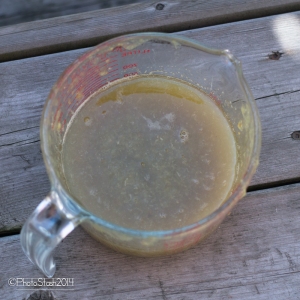
Simple Get-In-My-Mouth Concord Grape Jam

Small batch jam, No pectin, No canning, 2 ingredients, 2 hours from raw fruit to in your mouth! Tart & sweet, this is a grown-up jam, not the sickly sweet stuff we ate as kids.

We are lucky enough to have concord grape vines covering our back patio, and although a shortage of bees this spring meant that a lot of the grapes didn’t mature, there are enough ripe ones ready now for the raccoons to visit in the night! To save them from the critters, I decided to try my hand at some jam.
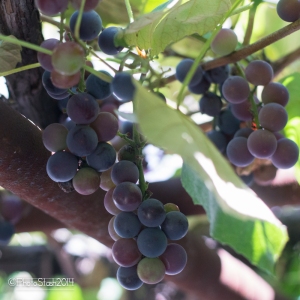
Concord grapes on the vine

The nice thing about jam is that you can make just one jar for your fridge and eat it until it’s gone. No need to make a HUGE batch with enough jars to survive an apocalypse! No need to go through all the canning steps if you just start eating it right away.

INGREDIENTS:

  • A bunch of grapes – I used about 8 cups of grapes (I just filled a big bowl!)
  • Some sugar – I used about 1.5 to 2 cups of raw sugar (It’s what was left in my sugar jar!)

***Before you start, put a little plate in the freezer. You’ll use it at the end to test the jam.***

STEP ONE:
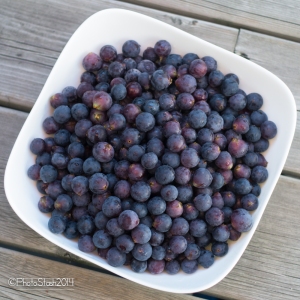
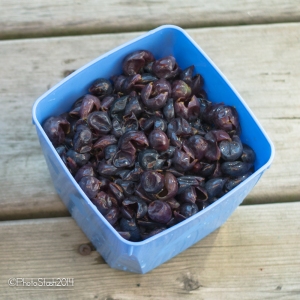
Concord grapes

Pick or buy some grapes (maybe you have a neighbour whose vines have grown beyond their property line?)

I make sure that I remove the stems and any “icky” grapes as I do this because it’s just easier to work with less variables. We have a lot of the “icky” grapes due to a lack of pollination so I’m pretty careful as I pull them off the vine one by one!

STEP TWO:
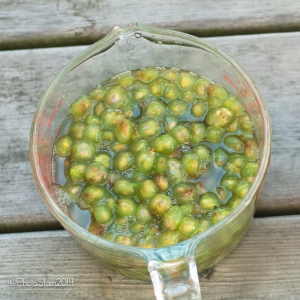
Pulp with seeds Just the skins

After you rinse your grapes, separate the skin from the pulp. You just squish the concord grape in your fingers and the pulp pops out! It’s mildly tedious, but really doesn’t take all that long. If you have kids available to you, this might be a good job for them!

STEP THREE:
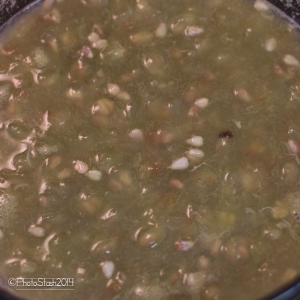
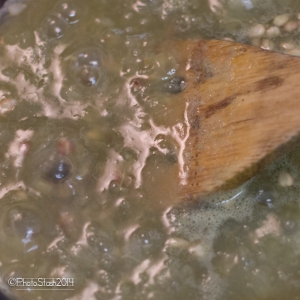
Cooking the pulp Cooking down the pulp

Over medium heat cook the grape pulp (the middle of the concord grape). It’s approx 15 to 20 minutes of a light simmer (little bubbles, not big splashing rolling boiling mush!). I use a flat bottom slotted wooden spoon to make sure nothing is sticking to the bottom of the pot. I stir frequently and keep an eye on it, but I don’t stand over the pot the whole time. Good tunes for kitchen-dancing are helpful at this stage!

You will notice that the seeds are suddenly all through the cooking pulp and that the whole mixture is becoming more liquid. Don’t worry about perfection. As long as most of the pulp has softened and let go of the seeds, then you are ready for Step Six. (Four and Five are not 100% necessary, but they help and can be done during Step Three or by your minions)

STEP FOUR:
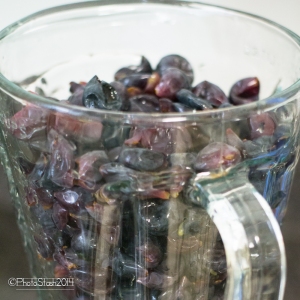
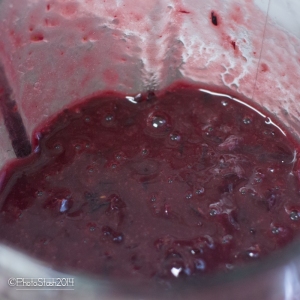
Grape skins in the blender Blended grape skins

While I’m cooking the pulp, I toss the grape skins (which do have a bit of grape flesh attached to them) into the blender for a very quick zip-zip. Some recipes I looked at don’t do this, but I found it a nice easy way to make sure that I didn’t have big skins in my jam, and so I didn’t have to do any extra straining (because no one likes straining stuff).

STEP FIVE:
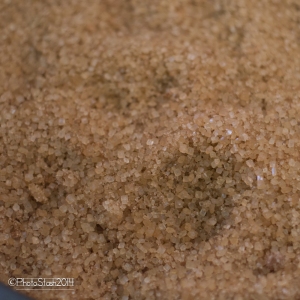
Warming the sugar

I’m not sure how vital this step is, but apparently it keeps the sugar from cooling your pulp. Toss the sugar into a cake pan or something similar and put it in the oven at the lowest temperature. My oven starts about 150F I think, but the numbers actually start at 200. Regardless, just make sure it’s at the lowest temp, and if you happen to miss this step I’m pretty sure it won’t wreck anything. Warm sugar sure does smell nice though.

STEP SIX:
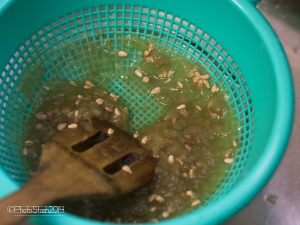
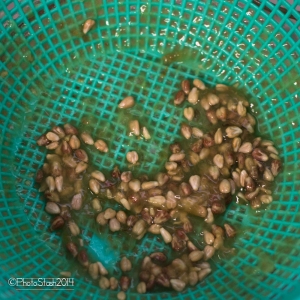
Straining the pulp Just the seeds left to discard De-seeded pulp

If you have a metal sieve that will work, I have also heard that cheesecloth is a good alternative. Basically I just mush the cooked down pulp around the colander a bit at a time until I only have seeds left. At first I kept the seeds aside in case I wanted to look up how to make Grape Seed Oil! Then I came to my senses and threw them in the compost bin.

STEP SEVEN:
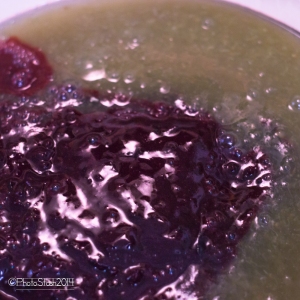
Mixing the pulp & the skins

Adding the sugar to the mix

At this stage I moved to a bigger pot because I like to see just how many things I can get dirty in my kitchen, and also because I realized I now had almost double the goop when I added in the grape skins.

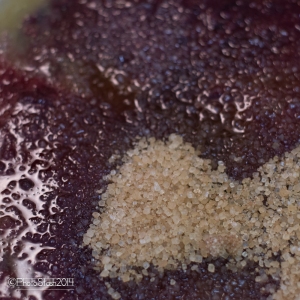
I stirred the sugar into the grape pulp and skin mixture. If you choose to use more sugar than I did, then I would suggest adding the sugar a bit at a time. Still on Medium heat, and still looking for a gentle little simmer and NOT a big rolling boil.
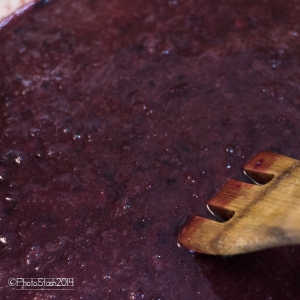
Cooking the jam

This is the MOST IMPORTANT PART! You will be cooking for about 30-45 minutes now, and you must gently stir more and more frequently as the mixture cooks down a bit and gets thicker. Take a potty break BEFORE you start this.

Again, a square bottom spoon is helpful to keep the jam from sticking to the bottom, but it’s not necessary to go shopping if you don’t have one. Just be thorough when you stir.
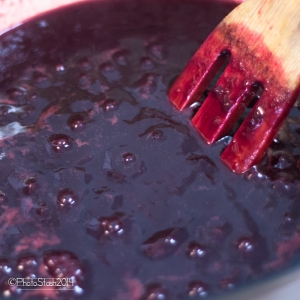
Almost jam

Here it is starting to look like jam, but it is still really smooth and runny. Be patient. (My first batch resulted in really delicious Grape Sauce – terrific on ice cream or yoghurt, not too great for spreading on toast) Oh – this is also the stage where you may regret the white shirt you are wearing…or maybe that’s just me. The thicker the jam gets, the more apt you are to find a fine spray of grape goo in a small radius around the pot.
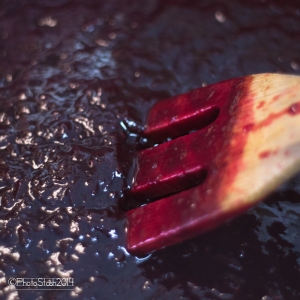
We have jam!

See how it has changed texture here? Now it looks a bit lumpy and thick and it is time to test it on the plate you tossed in the freezer before you started!
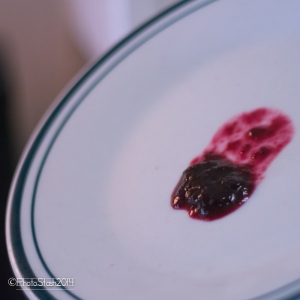
Testing the jam

Throw a spoonful onto the cold plate and put it back in the freezer for one minute. If it stays clumped like jam and starts to form a little skin on top then it’s ready! I had to do this test twice. Instead of washing my plate quickly and popping it back in the freezer for test number 2, I licked it clean and savoured the tastiness!

I turned off the heat and got a couple of recycled jars (jam or spaghetti sauce jars work just fine) and after letting the jam cool for a few minutes I filled a little jar to take to a dinner party that evening, and put the rest in a couple of little jars for my own fridge. Nothing like handing a jar of warm jam to your host when you arrive for dinner! Just be sure to tell them it must be refrigerated and consumed within a few weeks because it is not pressure sealed as it would be if we processed the jars like my grandmother used to.
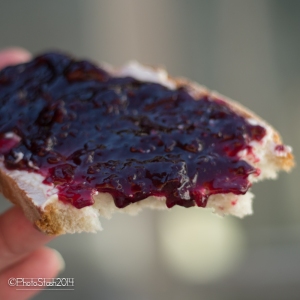
Jam and Bread!

STEP EIGHT:

Treat yourself to some freshly baked bread and pile on the jam!


I’m not a canning expert, so if you want to preserve your jam to give away at Christmas, do some googling and make sure you are making a safe product. For now I’m happy with the eat-it-now method of jam making!

I’d love to try this with alternate sugar sources (my sister is allergic to cane sugar) so it would be great to hear from anyone who like to experiment a bit!

Love-you-Baby Banana Berry Pancakes

Banana Berry Pancakes

STUFF TO MAKE THE PANCAKES:

1 ½ cups of flour (not the self-rising kind, but if that’s all you have, forget the next item)
2 tsp baking powder
1 tsp cinnamon
1 egg
1 cup 1% milk
2 ripe bananas (the riper the better – buy them on the sale rack in your produce dept!)
½ cup of blueberries & cut up strawberries
Canola oil for the pan (or whatever your fave is – just NOT sesame or olive oil)
Maple syrup (or your favourite pancake topping sauce)

HOW MUCH IT REALLY MAKES:

Makes 6 thick hearty pancakes! (After 1 ½ I was full, and I can eat!)

STEP-BY-STEP INSTRUCTIONS:

1 – Heat up your pan or griddle – not too high – medium heat is good – with a quick spill of oil so things won’t stick. You want to cook the pancakes slowly to make sure they are cooked all the way through and not burnt on the outsides.

2 – Mix the dry ingredients in a big bowl.

3 – Mash the bananas and the egg together, carefully adding the milk to the mix (keep it in the bowl!).

4 – Add wet stuff to the bowl of dry stuff stirring gently just to get it all combined. DO NOT OVER MIX! As soon as the dry is mixed in, just stop stirring – not even one more stir! I mean it!

5 – Take a ladle and put some pancake goop in the pan. Do this a few times to get multiple pancakes! I fit 3 in a regular sized cast iron frying pan.

6 – Take a teaspoon and drop a few berries on the top of each pancake. Approximately 6-10 little pieces – not to cover, but just so that you’ll get different flavours in each bite.

7 – Now – start the dishes. Just wash up what you’ve dirtied so far. You can also put the coffee on now!

8 – Take a plate and let it sit in hot water to warm up.

9 – You should see some bubbles popping around the edges of your pancakes and if you look at the bottom it should be that beautiful golden pancake colour.
Flip them over (use your spatula – no one wants to see blueberry juice on the ceiling) and let them cook a few minutes on the other side. If you’re worried that it’s not cooked, just poke into the biggest pancake with your spatula to be sure it’s not still raw.

10 – Dry off the plate in the hot water and put your first batch on it to keep warm.

Repeat steps 5 & 6, then wash the batter bowl while you wait to get to step 9.

Holler at your significant other to get their butt to the table (or lovingly invite them – whatever works in your house). Put less than you think you’ll want on your plate, add syrup as you like, and eat! You can always have seconds!
Now wait for your SO to look up and say, “Love you Baby!”

Robin’s Nest Watch – Days 9-12

On June 28th I held my phone above the nest in our grape vines and took another snap of the eggs. One had a black dot that appeared to be a small hole in the egg, but I started to question my eyesight the more I looked at the picture.

Is this the beginning of the hatching?

Is this the beginning of the hatching?

And THEN………..

On June 30th I thought I’d check on the eggs again while the mama was out of the nest and THIS is what I saw:

3 beautiful blue eggs magically turned into 3 blobs of pink and fuzz with alien eyes!

3 beautiful blue eggs magically turned into 3 blobs of pink and fuzz with alien eyes!

I’ll admit I was a little shocked to see that the eggs had been replaced by this strange pile of babies and I was reassured via some bird-loving friends on Facebook that it was ok that they were sleeping. How was I to know? I had only ever seen images of the babies with their mouths wide open begging for food!

On Canada Day, I thought I’d try to take a little video of the fledglings, and I’ll definitely take more as they grow!

Robin’s Nest Watch – Day 4

On Friday we noticed an abundance of bird activity in the grape vines over our back patio. A robin was scrimmaging with a couple of chickadees, but I just assumed that the scuffle was over some really tasty bugs!  Turns out that it’s actually a Robin’s nest, complete with a trio of beautiful blue eggs.

Robin's Egg Trio

I’ve done some reading, and it seems that the eggs gestate for about 12-14 days, with the mama robin spending lots of time sitting in the nest, or giving us the stink-eye from a few metres away as we try to enjoy the backyard.

20140621-_1000690

I’m working on a name for our lovely Robin mama, so do let me know if you have any suggestions!  In the meantime I’ll be keeping a close eye on the nest and will update as things develop.

My Backyard Garden Through My Eyes

Gallery

This gallery contains 12 photos.

I recently took a 20′ x 1.5′ unruly garden patch and made it into my summer vegetable market. It was full of 2 foot high weeds with incredible root systems, lots of worms and quite a few dandelions.  Some crawling … Continue reading

Childless, Not Childfree – Happy Mother’s Day

As Mother’s Day draws to a close, I’m still trying to come to terms with the day.  You see, I’m not a mom.  It’s partly by choice, partly by circumstance, and being over 40 it can be a very strange place to be.

I’ve had plenty of reminders of my status over the last few years.  My housemate had her little guy (whom I love dearly), I watched my sister bring my nephew into the world, and countless friends and acquaintances have added (or are adding) children to their families.

My own mom had me at the young age of 24.

mom day 2

I think she mostly had me because that’s what was expected at that time.  Not that she didn’t love me, but I think she might have made different choices if she thought she could.  The thing is, even now the expectations are still there.  Living in a big city, the timeline is a bit more flexible, but it’s still a bit odd to be a childless woman of a certain age.  I’m frequently told that I “still have time”.

I’ve always said that children weren’t a priority, but that I reserved the right to change my mind.  Indeed there have been a few times in my life, usually in a relationship that looked like it was headed for the long term, where I felt like it was the right path.  Sitting here now, I’m not upset that I didn’t go down it.

Having watched the mayhem that is mothering a small child, it’s not something that I would want to enter into alone.  I see it as another stage of a good solid loving relationship.  I’ve never wanted to be a mother just to be a mother, and I still feel that way.

Being so close to my sister and watching her bring my nephew into the world after fighting fiercely for him through years of fertility treatments has been both one of the most joyous experiences, and one of the more painful ones.  You know how you feel when your ex-boyfriend gets married?  You don’t want him, but it kind of feels crappy that he’s so happy and you’re not.  That’s pretty much what it’s like watching your baby sister become a mom.  Except that the joy part is so much bigger than I ever imagined it would be.

Simon & Chocha

I have been so full of love the last four months since Simon arrived that at times I literally thought I would burst.  Love for Simon and love for my sister as I watch her morph from my lil sis into an amazing mother.

There was a line in a song on the tv show Smash last night – “A writer hopes to leave behind, a work no one forgets; And when he writes, “the end”, to find he has the right regrets.”  I think that’s where I am right now.  I know that I’ve just never been in the right place to become a mom, and that to have taken that path would have been wrong for me. For me it feels like the ‘right regret’.  Now I get to be a part of my nephew’s life in a way that my aunts and uncles never were.  And I don’t have to pay for his diapers or his education!

So as the sun sets on another Mother’s Day, I say thank you to the mothers in my life.  Thank you for helping make me the woman I am.  Thank you raising the next generation.  Thank you for not making me feel less of a woman because I have chosen to be childless.  And thank you for allowing me to be a part of your children’s lives because I never said I wanted to be childfree.

Happy Mother’s Day.

Simon & Chocha 2

Seeing the world in Black and White

P1010739

The older I get, the less I see the world in black & white – more and more I see those proverbial shades of gray.  (Thankfully not on my head yet though! Good genes!) (Oh, and NO reference to the book currently making middle-aged women horny all over the land)

Back on topic – black & white & gray. I’ve been continuing my photographic journey and discovering that sometimes hiding in a very nice photo, is a stunning black and white image.  For me it’s about the shapes, the textures, the composition of the shot.  At first it was sometimes a way of ‘saving’ a photo with colour that didn’t pop for me, but I’ve come to see it more as a tool to pare down an image to its foundation.  There’s an emotion that exists for me in black & white images that can sometimes be obscured by colour.

Here are some of the b&w shots I’ve taken this summer.

P1040721
P1040773
P1040951
P1040393
P1050123-001
P1050472
P1010662
P1020588

Are you creative?

Whether you believe it or not, we are all creative!  Everyone starts at the beginning, with little skill, and maybe not much more than a vague desire to make some stuff.  Whatever your ‘thing’ is, just do it. Even if you think you fail miserably, you’re a step ahead of where you were before you tried.

For my birthday, I finally got a lovely new camera that is beginning to let me create what I see in my mind’s eye.  I’ve had a bit of access to cameras the last couple of years, but other than my sister’s (which had too many buttons and was too heavy to carry everywhere!) none of them have given me the freedom to create.  I was longing for the days of my lovely Olympus film SLR! 

I often get stuck partway with steep learning curves, but I’m tackling this one one step at a time, rather than all at once.  Instead of seeking perfection, I’m just looking to have some fun!  As long as I keep learning new things, I don’t mind some flops.  I look forward to looking back at these photos and seeing how far I’ve come!

My first night with the new camera I happened to be an awesome rock n’ roll show with a great bunch of bands and got a few lucky shots (considering I was still learning where the ‘ON’ button was located!)

P1000482
P1000101
P1000135
P1000516

The only way to really learn is to do, so I’ve tried to keep the camera close at hand with the battery charged and memory card inserted!  As a result I captured some fun shots of a friend’s little guy:

P1010009
P1000647

Yesterday I took myself on an Artists’ Date!  It is one of my favourite (long-ignored!) tools for creative growth from Julia Cameron’s The Artist’s Way.  The premise is that once a week you schedule an activity for yourself and you keep the date!  It actually should be less about creating art, than about refilling the well and hopefully inspiring you to create more.  I decided to go on a 12km photography walk through urban trails.  I’d been feeling a bit overwhelmed by how much there is to learn, so I focussed on 2 things – depth of field & macros.  Here are a few of my favourite shots:

P1010285
P1010339
P1010346
P1010355
P1010360
P1010369
P1010375
P1010370
P1010380
P1010395
P1010358
P1010390